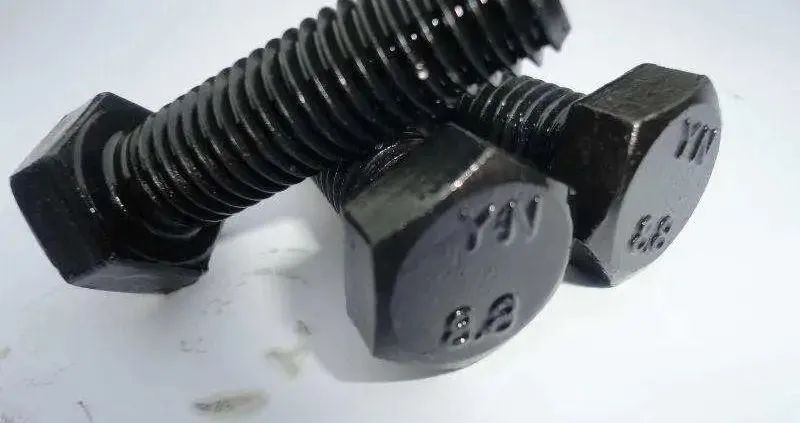
The performance grade of bolts used for steel structure connection is 3.6, 4.6, 4.8, 5.6, 6.8, 8.8, 9.8, 10.9, 12.9 and so on. Bolts of grade 8.8 and above are made of low carbon alloy steel or medium carbon steel and heat-treated (quenched, tempered), which are generally called high strength bolts and the rest are generally called ordinary bolts. High precision thread is the key to making high quality CNC machining parts.
The bolt performance grade label is composed of two parts, which respectively represent the nominal tensile strength value and the buckling ratio of the bolt material. Such as:
For bolts of performance class 4.6, the meaning is:
The nominal tensile strength of bolt material is up to 400MPa;
The strength ratio of bolt material is 0.6;
The nominal yield strength of bolt material is 400×0.6=240MPa.
Performance grade 10.9 high strength bolt, its material after heat treatment, can reach:
The nominal tensile strength of bolt material reaches 1000MPa;
The strength ratio of bolt material is 0.9;
The nominal yield strength of bolt material is 1000×0.9=900MPa.
The meaning of bolt performance grade is an international standard. Bolts of the same performance grade, regardless of the difference between their materials and origin, have the same performance, and only the performance grade can be selected in the design.
Strength grades 8.8 and 10.9 refer to the shear stress resistance grades of the bolts 8.8GPa and 10.9GPa
8.8 Nominal tensile strength 800N/MM2 nominal yield strength 640N/MM2
Generally, “x. Y” is used to indicate the strength of the bolt, X*100= the tensile strength of the bolt, X*100* (Y/10) = the yield strength of the bolt (because according to the label: yield strength/tensile strength =Y/10)
Such as 4.8, the tensile strength of the bolt is: 400MPa; The yield strength is 400*8/10=320MPa.
In addition: stainless steel bolts are usually labeled as A4-70, A2-70, the meaning of another interpretation.
To measure the
Length measuring unit in the world today there are two main types, one for the metric system, the measuring unit is meter (m), centimeters (cm), millimeters (mm), etc., in Europe, China and Japan and other southeast Asia use is more, another is English, the measuring unit is mainly for the inches (inch), equivalent to the old city “in our country, is widely used in the United States, Britain and other European and American countries.
Metric measurement: (base 10) 1m =100 cm=1000 mm
Imperial system: (base 8) 1 inch =8 minutes 1 inch =25.4 mm 3/8 x 25.4 =9.52
The products below 1/4 use the designation number to represent their address size, such as: 4#, 5#, 6#, 7#, 8#, 10#, 12#
The screw thread
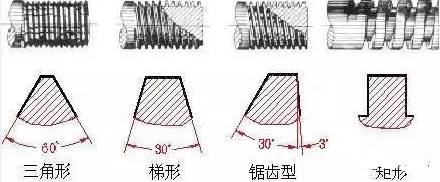
A thread is a shape with uniform spiral lines on the section of the outer or inner surface of a solid. According to its structural characteristics and uses can be divided into three categories:
Common thread: triangular tooth shape, used to join or fasten parts. Common thread is divided into two kinds of coarse thread and fine thread according to pitch, and fine thread has higher connection strength.
Transmission thread: tooth shape trapezoid, rectangle, saw and triangle, etc.
Seal thread: Used for seal connection, mainly pipe thread, taper thread and taper pipe thread.
Classification according to shape:
Thread fit grade
High precision threads are an integral part of making high quality CNC Machining parts.
The fit is the amount of slack or tightness between screw threads, and the fit grade is the specified combination of deviations and tolerances acting on the internal and external threads.
1. For uniform inch thread, there are three grades for external thread: 1A, 2A and 3A, and three grades for internal thread: 1B, 2B and 3B, all of which are gap fit. The higher the rank number, the tighter the fit. In inch THREADS, THE deviation is specified only for grades 1A and 2A, THE deviation for grade 3A is zero, and THE grade deviation for grade 1A and 2A is equal. The greater the number of grades, the smaller the tolerance.
Class 1A and 1B, very loose tolerance grades, suitable for tolerance fit of internal and external threads.
Classes 2A and 2B are the most common thread tolerance classes prescribed for the British series of mechanical fasteners.
Class 3A and 3B, screw to form the tightest fit, suitable for fasteners with tight tolerances, for safety critical design.
For external threads, CLASS 1A and 2A have a fit tolerance, CLASS 3A does not. Class 1A tolerance is 50% greater than class 2A tolerance, 75% greater than class 3A tolerance, for internal threads, class 2B tolerance is 30% greater than 2A tolerance. Class 1B is 50% larger than class 2B and 75% larger than class 3B.
2. Metric thread, the external thread has three thread grades: 4h, 6h and 6g, the internal thread has three thread grades: 5H, 6H, 7H. (The precision grades of daily thread are I, II, III, and usually II.) In metric thread, the basic deviation of H and h is zero. The basic deviation of G is positive, and the basic deviation of E, F and G is negative.
H is the common tolerance zone position of internal thread, generally not used as a surface coating, or with a very thin phosphating layer. G position basic deviation for special occasions, such as thicker coating, generally rarely used.
g is commonly used to plating 6-9um thin coating, if the product drawing requirements are 6h bolts, the screw thread before plating adopts 6g tolerance band.
The best combination of thread fit H/g, H/h or G/h, for bolts, nuts and other refined fastener threads, the standard recommended 6H/6g fit.
3. Thread marking
The main geometric parameters of self – tapping and self – drilling threads
1. Large diameter/external diameter (d1) : the diameter of an imaginary cylinder with overlapped threaded crowns. The thread diameter basically represents the nominal diameter of the thread size.
2. Footpath/bottom diameter (d2) : the diameter of an imaginary cylinder where the bottom of the thread overlaps.
3. Tooth spacing (p) : refers to the axial distance between two corresponding points of adjacent teeth on the midline. In the imperial system, the distance between teeth is indicated by the number of teeth per inch (25.4mm).
The following lists the common specifications of dental distance (metric) Number of teeth (inch)
1) Metric self-tapping:
Specifications: S T 1.5, S T1.9, S T2.2, S T2.6, S T2.9, S T3.3, S T3.5, S T3.9, S T4.2, S T4.8, S T5.5, S T6.3, S T8.0, S T9.5
Tooth distance: 0.5, 0.6, 0.8, 0.9, 1.1, 1.3, 1.3, 1.3, 1.4, 1.6, 1.8, 1.8, 2.1, 2.1
2) British self-tapping teeth:
Specifications: 4#, 5#, 6#, 7#, 8#, 10#, 12#, 14#
Number of teeth: AB teeth 24, 20, 20, 19, 18, 16, 14, 14
Tooth A 24, 20, 18, 16, 15, 12, 11, 10
Post time: Oct-08-2022


